An item is any piece of non-fixed asset inventory associated with a property, such as a refrigerator, range, dishwasher, or washer and dryer. Use the Items list to see all your items, search them, add new ones, and edit, move or replace an item.
 In this article
- Items list view
- Viewing the inventory dashboard (EOL schedule and expected life)
- Searching inventory items
- Adding an inventory item
- Item overview: details, activity, maintenance schedule and history
- Editing item details
- Moving an item to another unit or storage area
- Replacing an item (end of life or prolonged maintenance)
 Fixed assets are managed separately
Fixed assets, such as a unit HVAC system, a trash compactor, or an elevator, are managed in the Fixed Assets tab.
Items list view
The list view is the default view of inventories. It shows all your items at a glance, with pertinent information about each.
Viewing the inventory dashboard (EOL schedule and expected life)
 Select the dashboard icon
The dashboard shows insights such as the EOL (end-of-life) schedule, and EOL details such as an item's expected life in months.
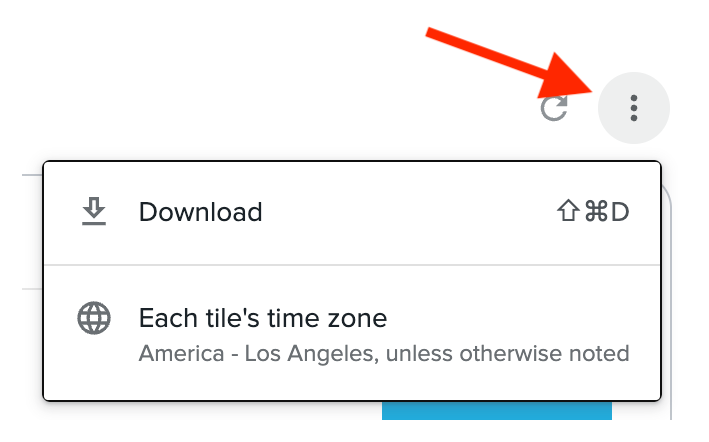
 Click the ellipses in the top right
Choose to download the dashboard or select an alternate timezone for the dashboard.
Searching inventory items
Use the Search bar in the top right to search by any item detail, such as serial number, location or model.
Dashboards are not searchable
Search works on the items list. Dashboards are not searchable at this time.
Adding an inventory item
Click the add button in the top right
The side drawer opens. You can do this at any time.
Enter the item details in the side drawer
Fill in the details for the new inventory item.
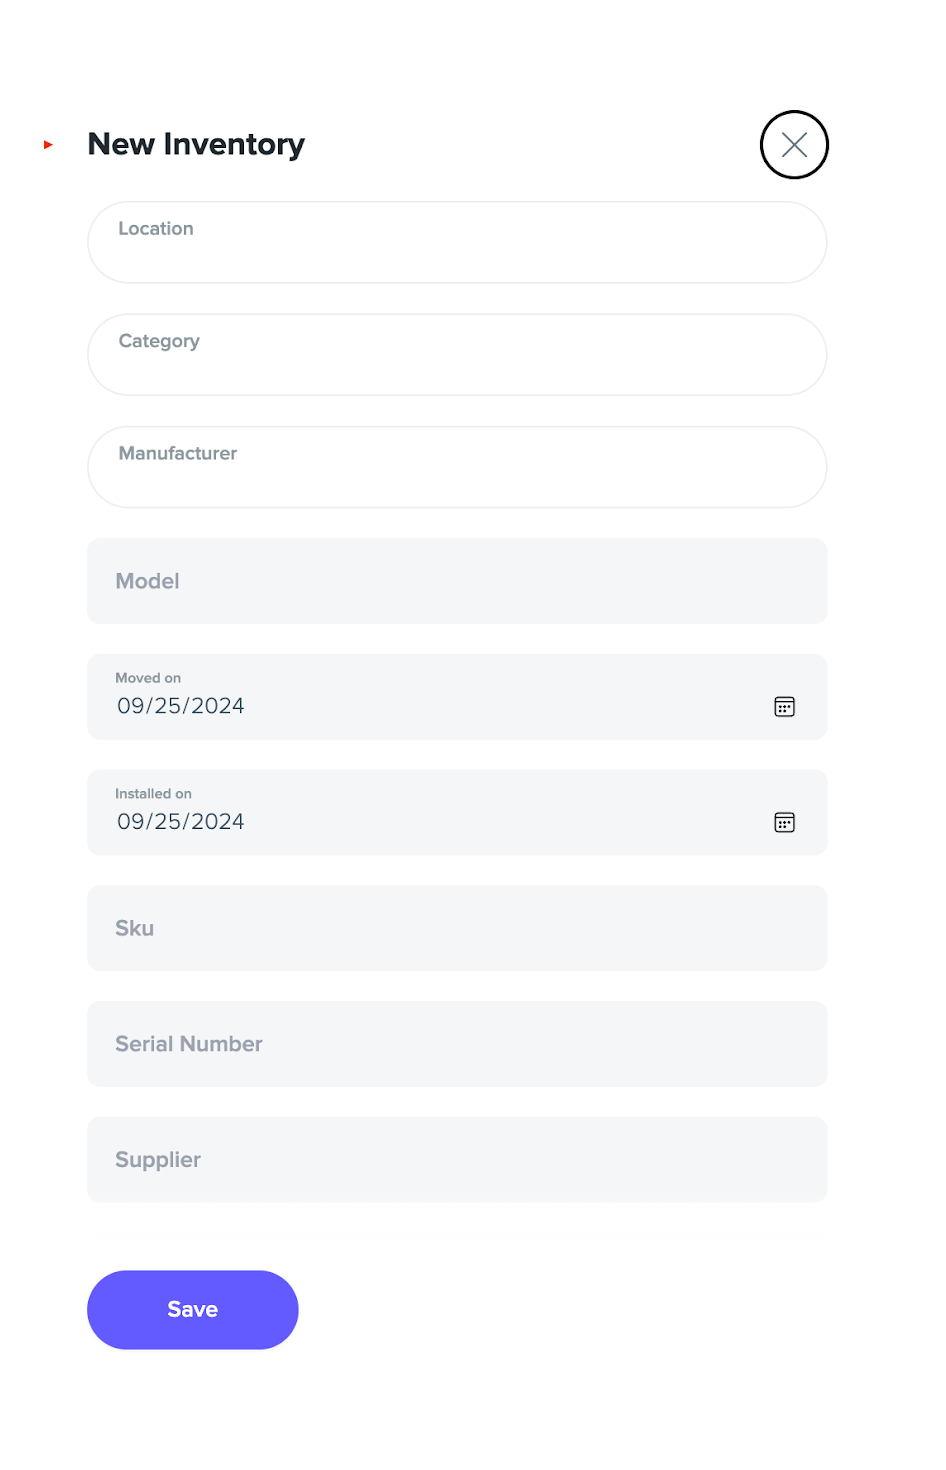
 Click Save
The item is created.
Items can also be created from a serial plate photo
Technicians photograph an item's serial plate on HPMA, inside a work order or an inspection. Google Document AI reads the model, serial and brand and creates the inventory item.
Item overview: details, activity, maintenance schedule and history
Select any item from the items list to view its details. The Overview tab has these sections:
- Details: purchase date, cost, warranty end date, assigned location, and more.
- Activity: logs of item activity, such as when the item was under maintenance or marked as Do Not Repair.
- Maintenance Schedule: if the item model has a preventative maintenance schedule, its maintenance items with frequency and urgency.
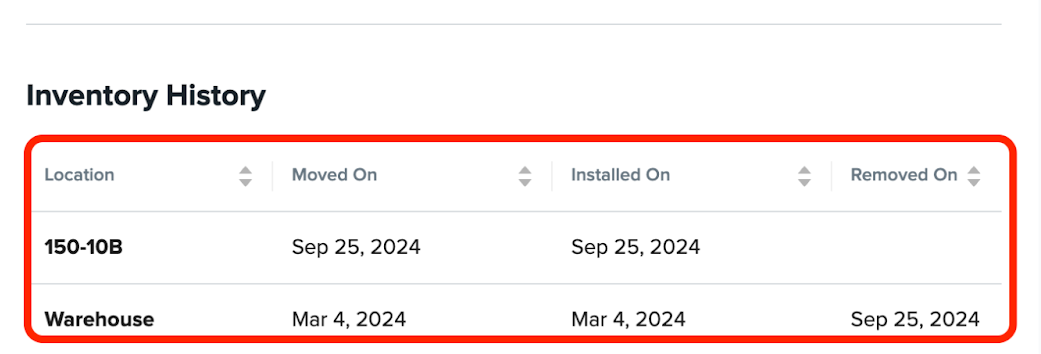
- Inventory History: every time this item has been moved from one unit to another.
- Quick Actions: edit, move, or replace the item.
Editing item details
In Quick Actions, click the edit details button
The side drawer opens so you can edit the item details.
Moving an item to another unit or storage area
In Quick Actions, click the move button
The side drawer opens. Use this when moving an item from a storage area or unit to another unit, or back to a storage area.
Select the unit to move the item to
Choose the destination in the side drawer.
Pick the Moved On and Installed On dates
Set both dates in the side drawer.
 Click Move Item
The item is moved.
Replacing an item (end of life or prolonged maintenance)
In Quick Actions, click the replace button
The side drawer opens.
Select the item to replace with
Choose the replacement item in the side drawer.
Click Confirm Replacement
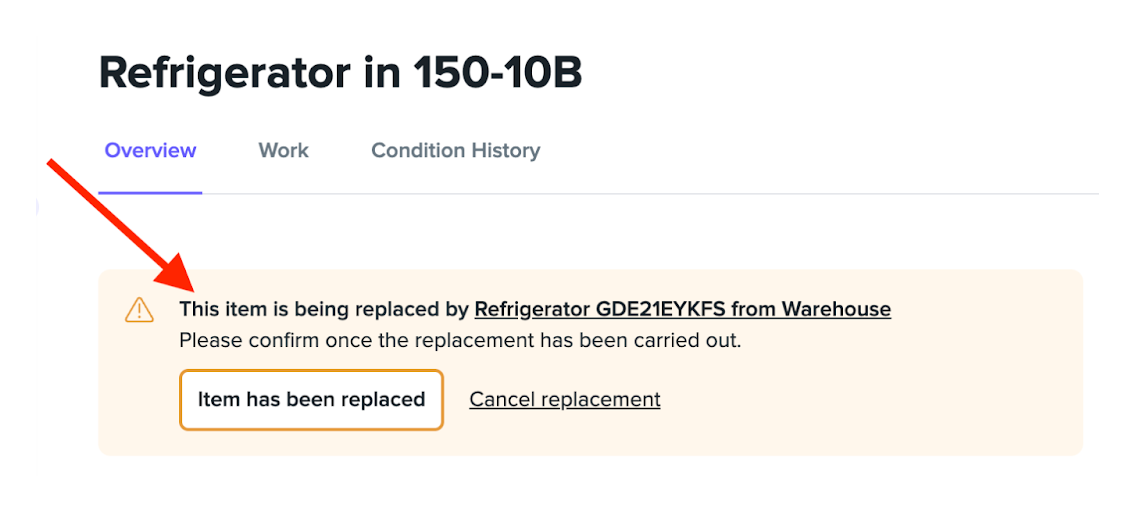
The replacement goes into a pending state.
 Tip
While pending, you can cancel the replacement or confirm it once the replacement has been completed.
When the work is done, select Item has been replaced
The side drawer opens.
 Select where the old item has been moved to, then click Confirm Replacement
The replacement is completed.
 Check Inventory History on the new item
You are taken to the Overview tab of the new item. Inventory History shows where the new item was pulled from.