
Settings › Users is where you add users, change their roles and property access, and deactivate them. It replaces the Users pages that used to be in Admin Center › Users.
 In this article
- What's changed in Users settings
- Find a user in the Users list
- Add a user in Settings
- Import users from a CSV file
- Edit a user
- Change a user's details (User Details tab)
- Set a temporary password
- Change a user's roles (Role Management tab)
- Change a user's property access (Property Access tab)
- Set availability and skills (Auto-Assign accounts)
- Change several users at once (bulk actions)
- Deactivate or activate a user
- Unlink a user from SSO
- Frequently asked questions
What's changed in Users settings
- Users used to be in Admin Center › Users. They're now in Settings › Users.
- New User opens a full page instead of a side panel.
- A user's page has five tabs: User Details, Availability, Skills, Role Management and Property Access.
- Property access is only managed here, not on the property.
- Properties are grouped by region, so you can give access to a whole region at once.
- Deactivate and Unlink SSO ask you to confirm.
| To do this | Permission needed |
|---|---|
| Open Users, add users and edit them | Edit Users |
| Change a user's property access, for one user or several | Edit Users and Set Property Access |
| See the Availability and Skills tabs | View Technician Profile. Your account must also use Auto-Assign. |
| Edit availability and skills | Edit Technician Profile |
 You can only assign roles your role allows
You can only give users the roles you're allowed to assign. If your role has Restricted access to create Users, new users get your account's default role.
Find a user in the Users list
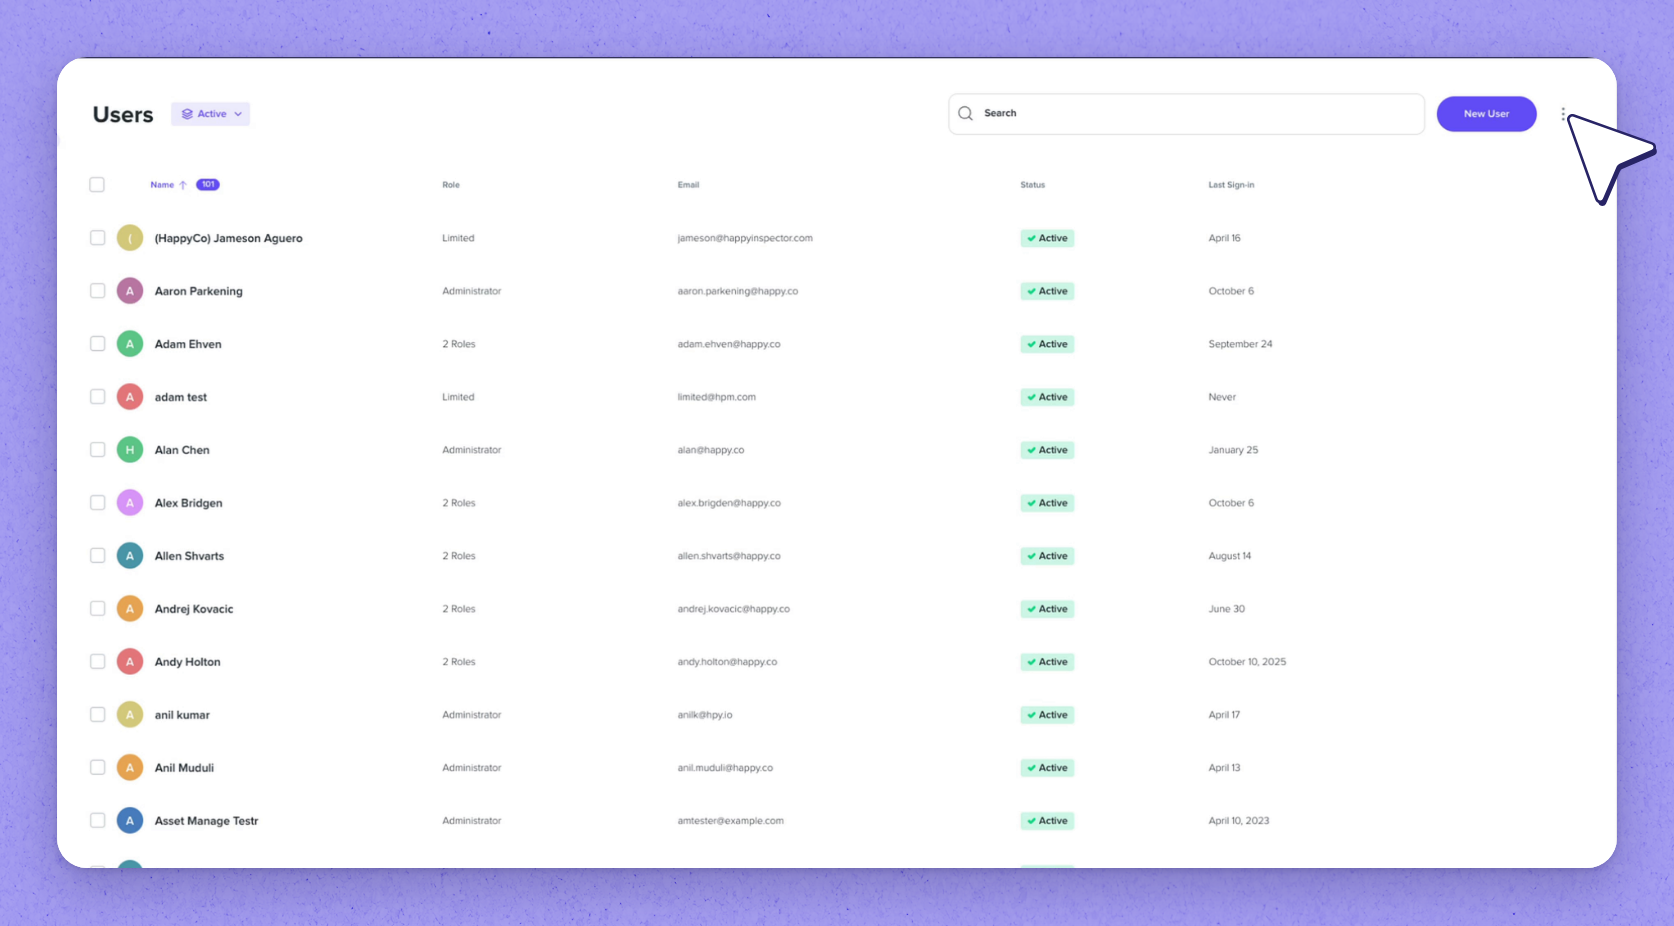
Go to Settings › Users. The list shows each user's Name, Role, Email, Status and Last Sign-In.
The list shows active users. To see deactivated users, change the Status filter. Use Search users to find someone.
Add a user in Settings
 Start a new user
In Settings › Users, select New User.
 Enter their details
Enter their Full Name, Short Name and Email. Phone is optional.
 Choose a role
Choose a Role.
 Add a personal message (optional)
Add a Personal Message (optional). It's sent to the new user.
 Create the user
Select Create User.
 Tip
If the email address already has a HappyCo account, that person is added to your account.
Import users from a CSV file
Download the template
Select More Actions (⋮), then Download CSV Template.
Fill in the template
Fill in the Email, First Name, Last Name and Phone Number columns.
Tip
You can import up to 500 users at a time.
Open the import
Select More Actions (⋮), then Import Users.
Choose a role
Choose a Role. Every imported user gets this role.
Import the file
Choose your CSV File and select Import Users.
Tip
The results show how many users were imported, which email addresses already have a HappyCo account, and any rows that couldn't be imported.
Edit a user
Select a user to open their page.
Change a user's details (User Details tab)
-
Edit their details
On the User Details tab, change their Full Name, Short Name, Email or Phone. TipIf the user has access to more than one HappyCo account, a name change applies to all of them. You can only change their email if you're an admin of every account they belong to.
-
Save your changes
Save your changes.
Set a temporary password
Choose to set a temporary password
On the user's page, choose to set a temporary password.
Enter the password twice
Enter it in Temporary Password and Confirm Temporary Password. It must be at least 8 characters.
Set the password
Select Set Password.
Tip
They're asked to choose a new password the next time they sign in.
Change a user's roles (Role Management tab)
Tick the roles
On the Role Management tab, tick the roles the user should have. They need at least one.
Tip
Roles you aren't allowed to assign can't be ticked.
Save your changes
Save your changes.
Change a user's property access (Property Access tab)
Open the Property Access tab
Open the Property Access tab. Properties are grouped by region. Properties without a region are under No Region.
Tick properties or regions
In the Direct Access column, tick each property the user should access. Tick a region to give access to every property in it.
Save and confirm
Save, then select Update Access to confirm.
Tip
Large changes can take a few minutes. Stay on the page until it's done.
What you can't change on the Property Access tab
- The Business Access column shows properties that every user on your account can access. You can't change it here.
- If the user's role gives access to all properties, there's nothing to set.
- Single-family accounts see Folder Access instead.
Single-family accounts and the View only notice
Single-family accounts see "folders" in place of "properties" in these notices. The View only notice is unchanged.
Set availability and skills (Auto-Assign accounts)
-
Set working hours
On the Availability tab, set Working Hours for each day. TipThe Availability and Skills tabs show only if your account uses Auto-Assign.
-
Add time off
To add leave, select Schedule Time Off, choose Full Day(s) or Partial Day(s), and enter the dates. -
Choose skills
On the Skills tab, choose the skill sets the technician can handle. -
Confirm the update
Select Confirm Update to go ahead.
 Changing availability or skills can reassign work orders
Changing availability or skills can change Auto-Assign. Some work orders may be unassigned and assigned again.
Change several users at once (bulk actions)
-
Select users
In Settings › Users, tick the users you want to change. -
Choose an action
Choose Add Role, Remove Role, Add Property Access or Remove Property Access. -
Choose and confirm
Choose the role or properties, then confirm. TipProperty access changes can take a few minutes. Stay on the page until they're done. If you've selected too many users, select fewer and try again.
How bulk role and access changes behave
- Add Role and Add Property Access keep each user's existing roles and access.
- Remove Role won't run if it would leave any selected user with no role.
Deactivate or activate a user
-
Open the user
Open the user. -
Deactivate and confirm
Select Deactivate, then confirm. TipThey can't access your account until you select Activate.
Unlink a user from SSO
To disconnect a user's account from your SSO provider, select Unlink SSO and confirm.
Users managed through SCIM
If a user gets their roles from a group in your identity provider, you can't change their roles or deactivate them in HappyCo. Property access given through a group is also managed in your identity provider. Make these changes there.
Frequently asked questions
Can I delete a user?
No. Deactivate them instead.
How do I give someone access to every property in a region?
Open the user, select Property Access, tick the region and save.
Why can't I edit a user's email?
You need to be an admin of every HappyCo account the user belongs to.
Why can't I change a user's roles?
Either their roles come from a group in your identity provider, or your role isn't allowed to assign those roles.
I don't see Deactivate
Deactivate isn't shown for users managed through SCIM, or for users with a role you can't assign. It also isn't on every account.
I don't see Import Users or the bulk actions
They aren't on every account. Contact your Customer Experience Manager (CXM).
Why does Admin Center › Users take me to Settings?
Settings is turned on per account. When it's on, Settings appears in the Experience Switcher and the old Admin Center user pages redirect to it.
Why is the roles list locked with a Roles are managed by Groups notice?
At least one of the user's Groups has roles. To change roles, edit those Groups or update membership in your identity provider.