
Procurement by HappyCo is a purchasing catalog, opened from Happy Property Maintenance, where your team browses items, buys them or requests approval, and tracks orders. An admin uses it to set up the company procurement account, add members with spend limits and approvers, and manage shipping locations and payment methods.
 In this article
- What you can do with Procurement
- Enable Procurement in Admin Center
- Register the admin procurement account
- Add members to your procurement account (shop.happyco.com)
- How purchase approvals and spend limits work
- Add shipping locations (shop.happyco.com)
- Add payment methods (shop.happyco.com)
- Save the procurement link as a Favorite (non-admin members, Happy Property Maintenance)
What you can do with Procurement
- Permission users to have access to the Procurement navigation button in Happy Property Maintenance
- Create an Admin account within procurement
- Add users manually under the admin account, then send an invitation email to sub-users
- Create an approval hierarchy for each user
- Assign permissions, including spending thresholds, for each user
- Assign shipping locations to each user
- Assign users to view only specific catalogs
- Browse thousands of items
- Add items to a shopping cart
- Purchase items or request approval to purchase items
- View tracking information and estimated delivery dates
- View past orders
- Pull order reports
Related links
Enable Procurement in Admin Center
 Turn on the Procurement by HappyCo feature release
In Admin Center, open Feature Releases and enable Procurement by HappyCo.
 Tip
This is a business-level feature: it is either on for all properties or off for all properties.
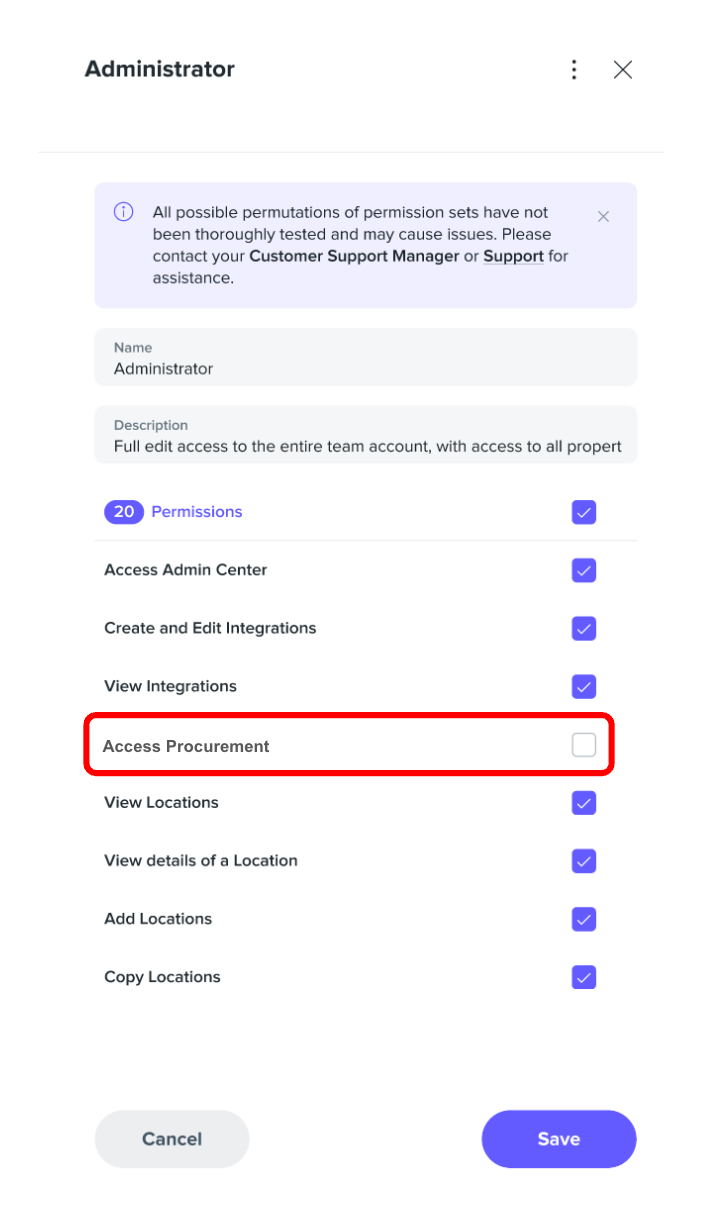
 Assign the Access Procurement permission to a role
Once the feature is enabled, a new permission called Access Procurement appears in the permission list for Roles in Admin Center. Assign it to the role that should use Procurement.
Tip
HappyCo recommends assigning this permission only to Admin roles, then adding sub-users to your procurement account manually.
 Check the Procurement tab in Happy Property Maintenance
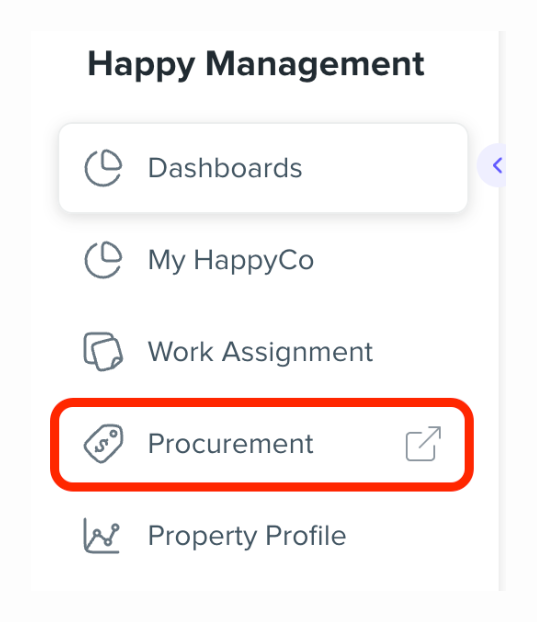
Users with the permission see the Procurement tab in the Happy Property Maintenance navigation bar and can use it.
Register the admin procurement account
Open Procurement from Happy Property Maintenance
Select the Procurement link. You are taken to the procurement login page.
Register the business account
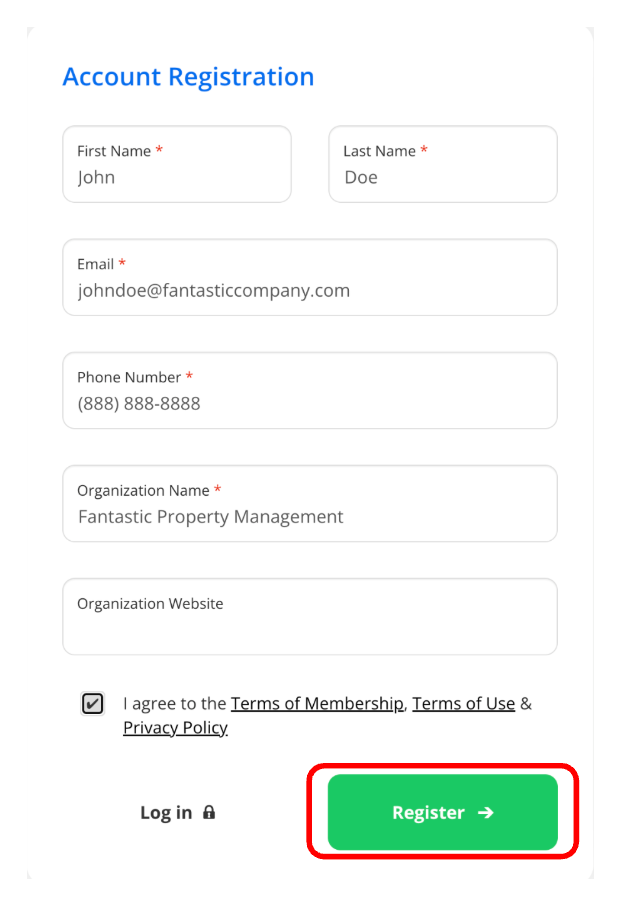
If this is your first time, select Register, then fill out the account information to create the business account.
Open the activation email
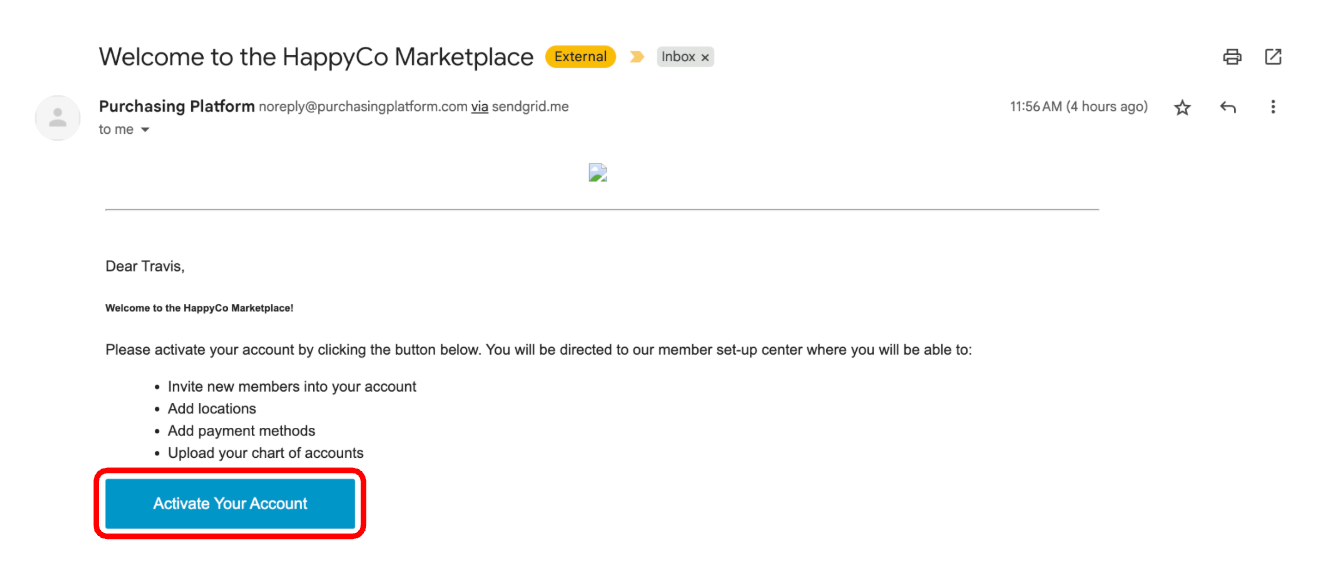
An activation email is sent to the email address entered on the registration page. Select Activate Your Account in that email.
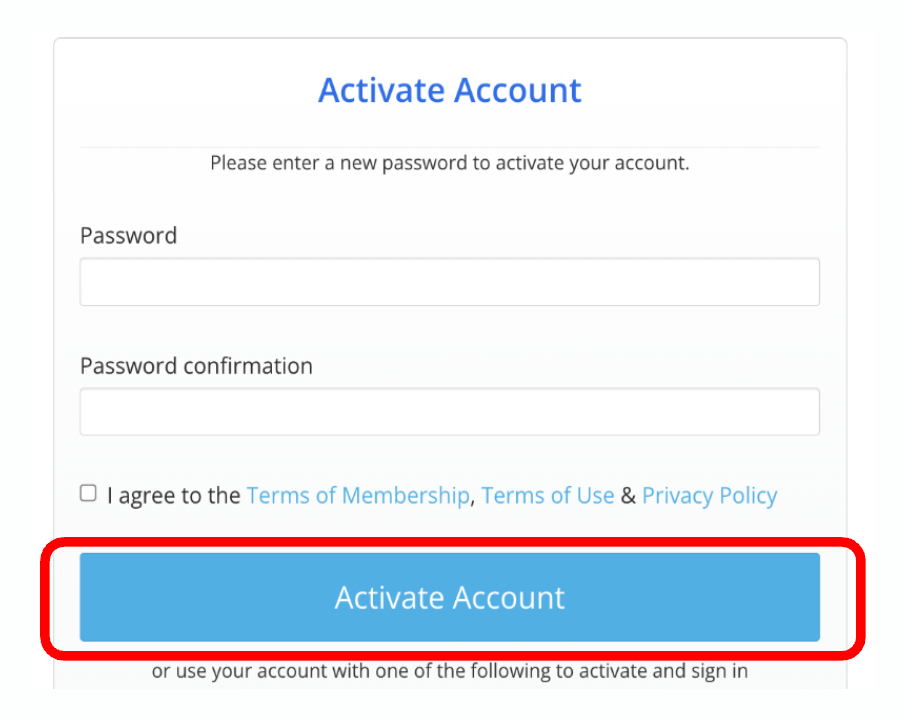
 Create a password
, then select Activate Account.
 Log in from Happy Property Maintenance or shop.happyco.com
After you create a password you are directed to log in. Do not log in on that page. Go back to Happy Property Maintenance and select the Procurement link again, or open shop.happyco.com in your browser and log in there.
Tip
Logging in on the page shown right after activation means your credentials will not work.
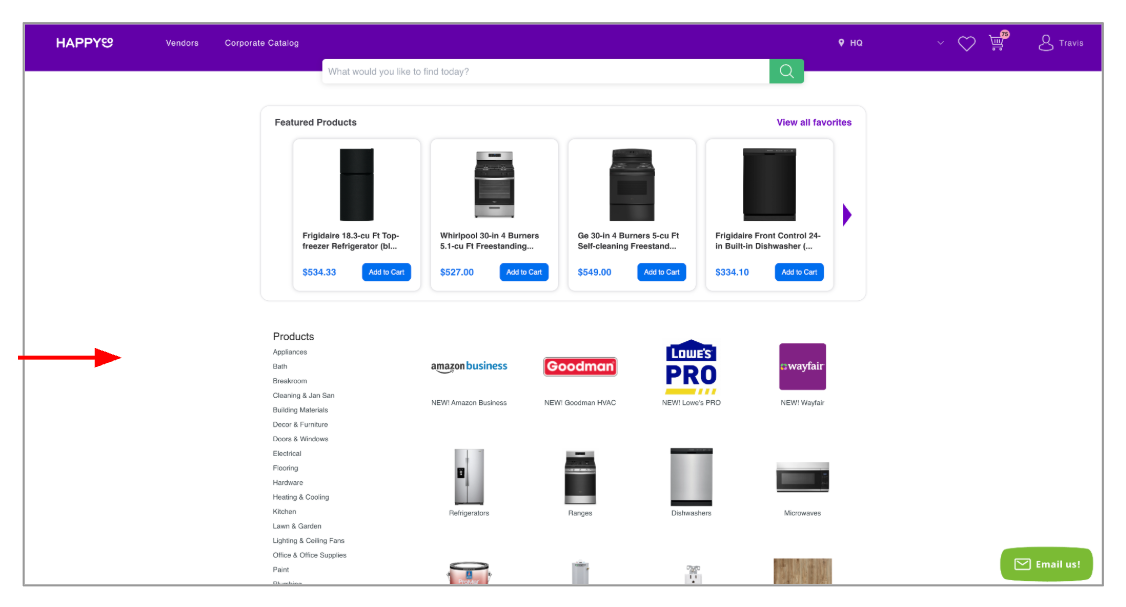
 Confirm you reach the catalog
After logging in you land on the main catalog screen.
 Don't log in right after activating
Once you create a password you are prompted to log in, but your credentials will not work there. Log in from the Procurement tab in Happy Property Maintenance or at shop.happyco.com instead.
 Procurement support is handled by Purchasing Platform
The activation email shows contact information for Purchasing Platform. HappyCo has partnered with Purchasing Platform to handle all procurement support.
Add members to your procurement account (shop.happyco.com)
Open Members
Select your profile icon in the top right, then Settings, then Members.
Tip
As the admin, you will likely be the only member on the account at first.
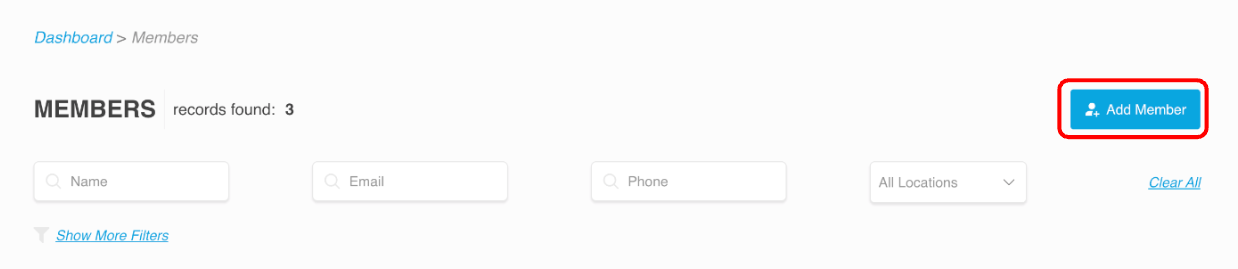
Add a member
Select Add Member. Members are added manually, one at a time.
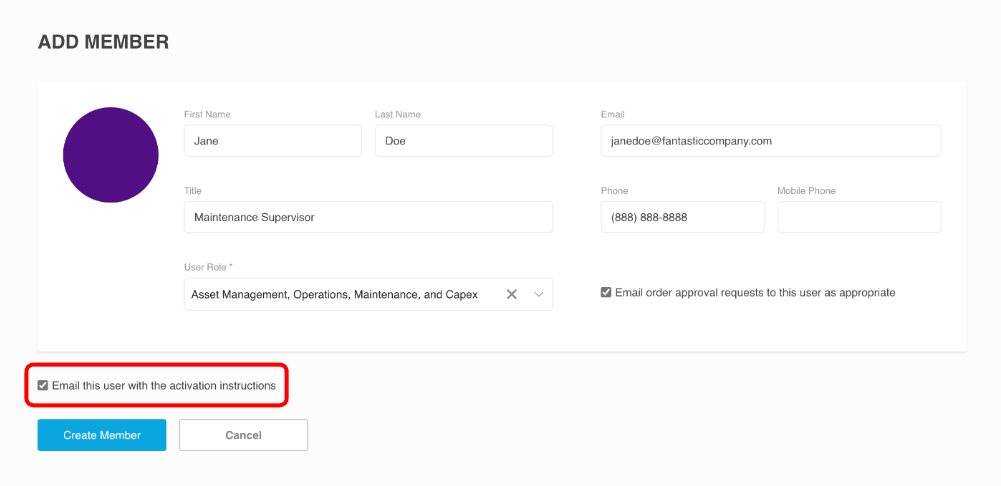
Fill out the member form and send activation
Fill out all required fields and select the box for Email this user with the activation instructions. The member uses that email to activate their account and create a password.
Set up the member's profile
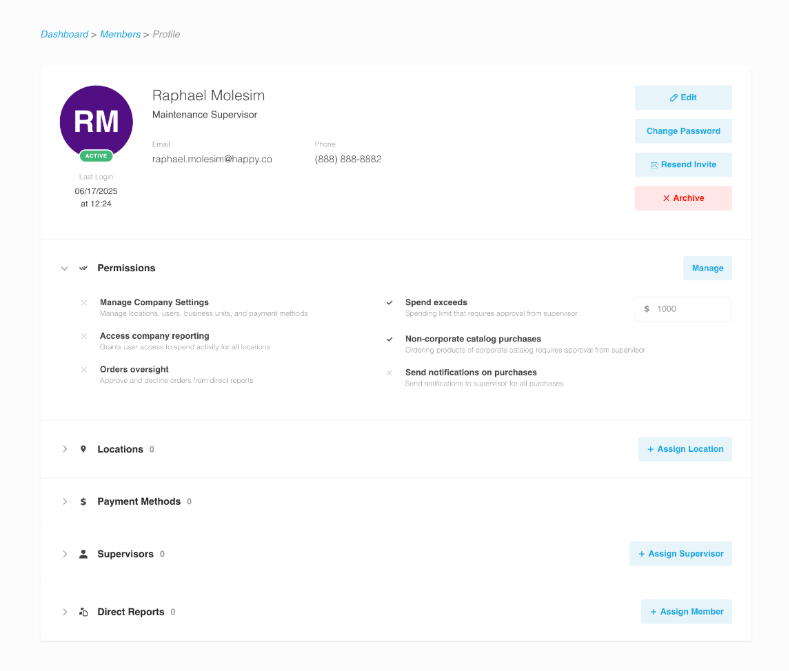
After you create the member, their profile page opens. From here, update their information, manage permissions and spend limits, assign locations, and build an approval hierarchy using the Supervisors and Direct Reports settings.
How purchase approvals and spend limits work
Once members are in the system, add Supervisors and Direct Reports to create the approval hierarchy. When a member tries to spend over their spend limit, the approval routes to their supervisors. When one of your direct reports tries to spend over their spend limit, the approval routes to you.
Add shipping locations (shop.happyco.com)
Open Locations
Go to the Settings area, then Company Settings, then Locations, and select + Add Location.
Tip
Locations are typically property addresses or storage facilities where you want items delivered.
Create the location
Fill out the form and select Create Location.
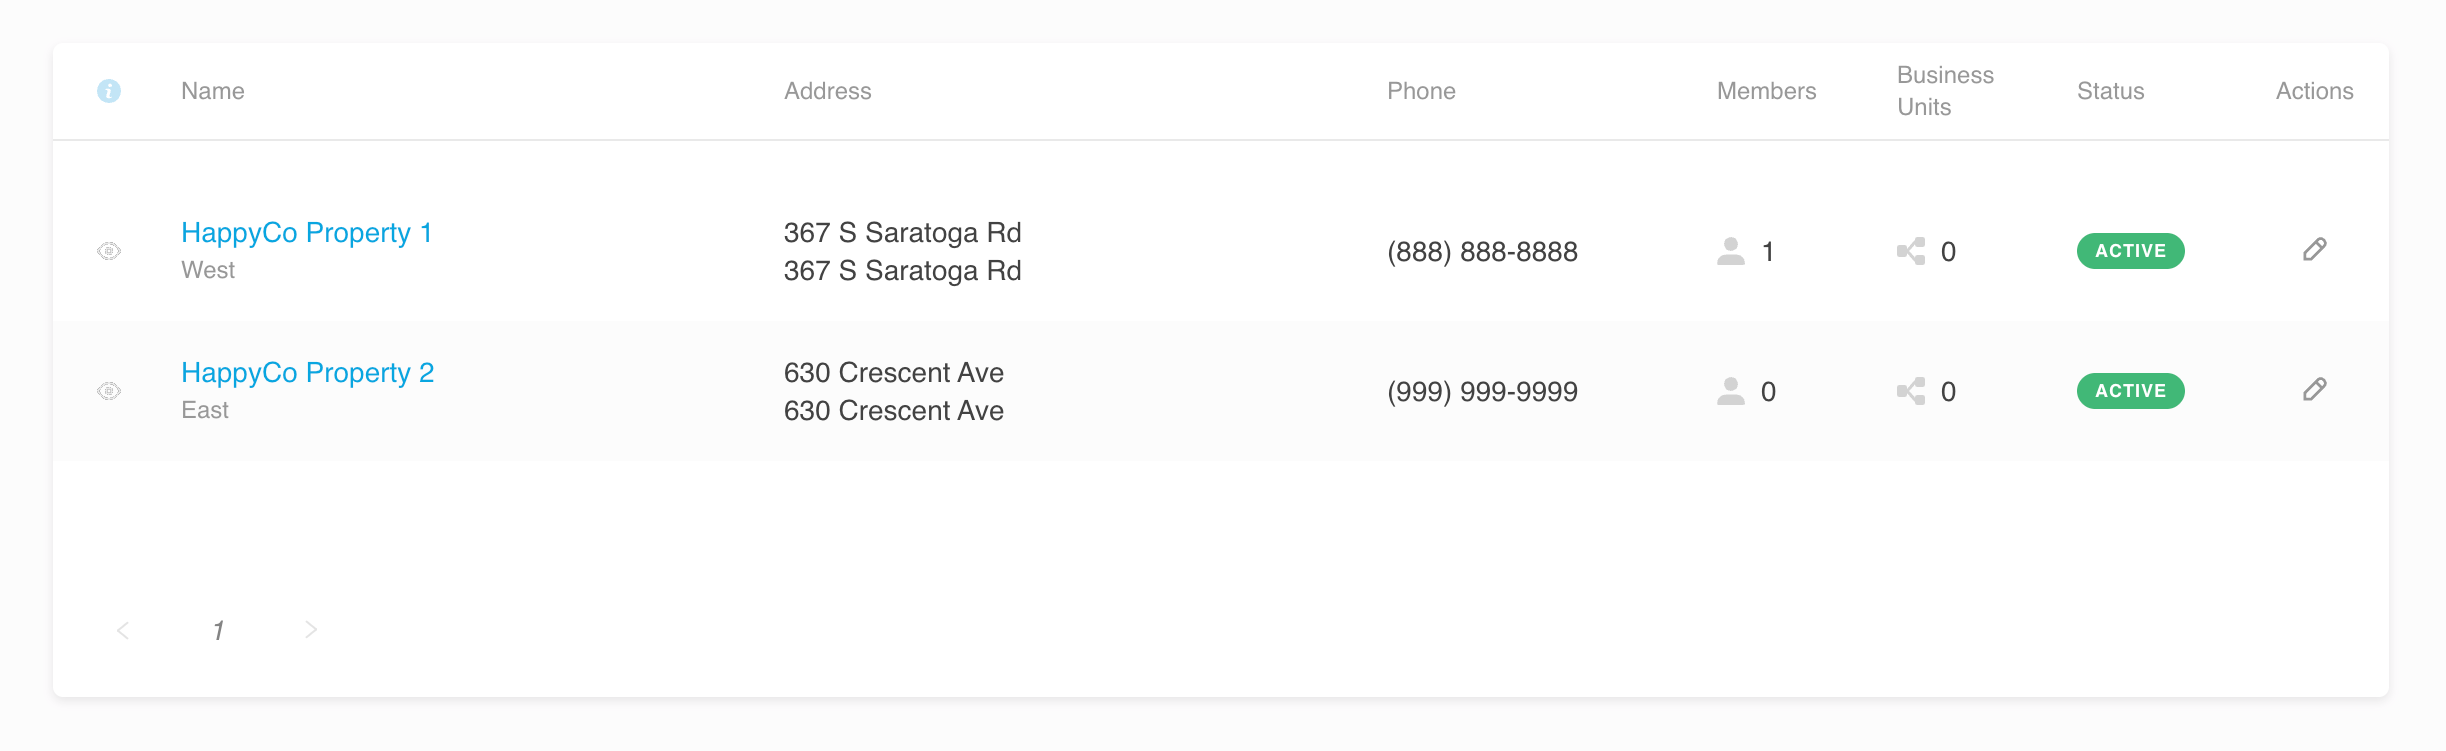
Review your locations
Once added, the location appears in the list of all locations.
Add members to a location
Select any property to open its profile and add members to the location.
Tip
You can also add a location to a member from the member's profile.
Add payment methods (shop.happyco.com)
Open Payment Methods
Go to the Settings area, then Company Settings, then Payment Methods, and select + Add Card or + Add Bank Account.
Add the payment method
Fill out the form, then select the button to add the payment method.
Assign members to the payment method
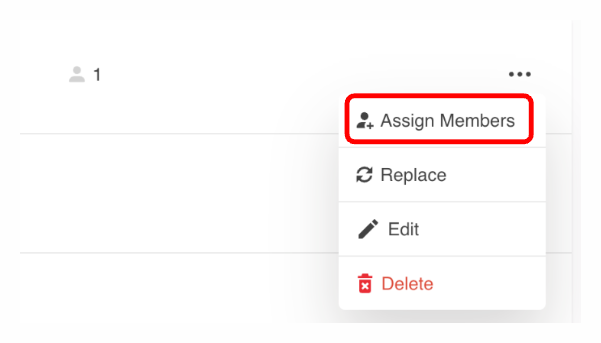
Go back to the list of payment methods, expand the item details, select the ellipses (three dots), then select Assign Members. Assigned members can use this payment method at checkout.
Save the procurement link as a Favorite (non-admin members, Happy Property Maintenance)
Add a Favorite
In Happy Property Maintenance, select the + icon in Favorites.
Clear the Name and URL fields
Delete all the text in the Name and URL fields.
Tip
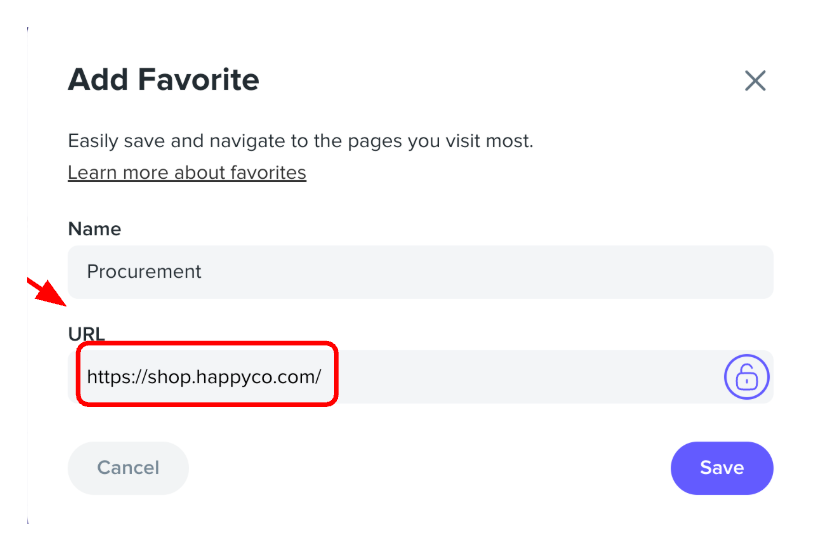
Select the unlock button first to edit the URL field.
Enter the procurement URL and save
Enter https://shop.happyco.com/ as the URL, enter any name, then select Save.
Open Procurement from the Favorite
Any user added as a procurement member can use the saved quick link to open the procurement page.
Spend limits trigger approvals
Any spend limit you set for a member sends an approval to their supervisor within the procurement workflow.