
The Document Management feature in Happy Property lets you upload, organize and manage files (documents, photos, audio and video) for your properties in Manage. Use it to keep each property's Unit and Vendor files in one place, then open, share by link or email, move or delete them.
 In this article
- How the document folder structure works
- Upload limits
- Navigating and sorting document folders in Manage
- Uploading documents
- Viewing and editing document details
- Opening the Actions menu for a document
- Opening a document
- Sharing a document with a public link
- Sharing a document by email
- Moving a document to another folder
- Deleting a document
- Frequently asked questions
How the document folder structure works
The folder structure generates automatically to reflect your property's setup.
- Files are organized into individual folders for Units and Vendors.
- Selecting a different property refreshes the documents section to match that property's structure.
Upload limits
These limits apply when you upload files:
- Maximum of 50 files per individual upload.
- Unlimited total files per folder.
- Maximum file size of 100MB per file.
| File type | Supported extensions |
|---|---|
| Images | .bmp, .gif, .jpeg, .jpg, .png, .svg, .tif, .tiff, .webp |
| Documents | .doc, .docx, .dot, .odp, .ods, .odt, .pdf, .ppsx, .ppt, .pptx, .vsd, .xls, .csv, .tab, .tsv, .rtf, .txt, .xlsx |
| Audio | .3g2, .3gp, .aac, .m4a, .mid, .midi, .mp3, .oga, .ogg, .wav, .weba |
| Video | .3g2, .3gp, .avi, .mov, .mp4, .mpeg, .mpg, .ogv, .ts, .webm, .wmv |
| Video (NVR) | .dav, .asf, .box, .bix, .dat, .264, .h264 |
Navigating and sorting document folders in Manage
-
Open the Documents area
In Manage, select a property to access the Documents area. -
Open a folder
Double-click to drill down into the corresponding Unit and Vendor folders. -
Go back up the folder tree
Click the breadcrumb bar at the top of the page. -
Change the sort order
Click a column heading (Name, Extension, Owner, Date Added, Expiry). Tip
By default, items are sorted by Name in ascending order. Nested folders always appear at the top of the list, with files underneath.
Uploading documents
 Open the destination folder
Navigate to the folder where you want to add files.
 Click Upload
 in the top right corner.
 Add your files
In the upload panel, browse your computer or drag and drop files into the drop zone.
Tip
You can upload up to 50 files at a time, each up to 100MB.
Viewing and editing document details
Open the Document Details Panel
Click a document entry. The Document Details Panel opens on the right side of the screen.
Review the read-only details
View the date added, document owner and creator.
Edit the name or expiry date
Change the Document Name or Expiry date.
 Save or discard your changes
Click Save in the bottom right corner to apply changes. To discard them, click Cancel or the X icon.
Opening the Actions menu for a document
The Actions menu lets you open, share, move or delete files. To open it, click the Ellipsis (...) on the far right of a file in the list, or at the top right of the Document Details Panel.
Opening a document
-
Select Open
Select Open from the Actions menu. TipImages and PDFs open as a browser preview. Other formats download to your computer, typically to your default Downloads folder.
Sharing a document with a public link
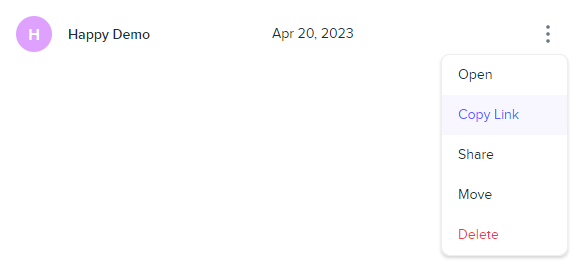
Select Copy Link
Select Copy Link from the Actions menu.
Set the link expiry
In Link Expiry, set a timeframe for the link to expire.
Tip
Keep the default Never option unless you want to restrict the duration of access.
Create the link
Click Get Link on the bottom right.
Copy the link
Click Copy above the link.
 Close the dialog
Click Done or the X icon.
Sharing a document by email
Select Share
Select Share from the Actions menu.
Set the link expiry
In Link Expiry, set a timeframe for the link to expire.
Tip
The default is Never.
Enter recipient email addresses
Type each recipient's email address.
Tip
Valid addresses display as a button. To remove an incorrect address, click the X next to it.
Send the email
Click Send Email.
Close the dialog
Click Done or the X icon.
Tip
Recipients receive an email with the file name, expiry date and the link to access the file.
Moving a document to another folder
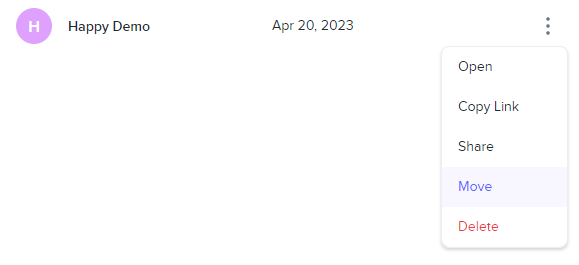
Select Move
Select Move from the Actions menu.
Choose the destination folder
Use the Move to menu to locate the destination folder.
Confirm the move
Click Yes, Move Document.
Deleting a document
-
Select Delete
Select Delete from the Actions menu. TipDeleted files and folders cannot be recovered by users.
-
Confirm the deletion
Click Yes, Delete.
 Deleted files can't be recovered
You can't recover accidentally deleted files or folders yourself. If you delete a document you still need, contact HappyCo Support at support@happy.co for assistance.
Frequently asked questions
Can I create my own folder structure?
No. The folder structure generates automatically based on how your property is structured in Happy Property (Units and Vendors).
How long do shared document links remain active?
By default, shared links are set to Never expire. You can set a timeframe for the link to expire when you generate the link or send the email.
Can I change a document's name after uploading it?
Yes. Click the document to open the Document Details Panel, edit the Document Name, and click Save.