
Property settings are settings you apply to an individual property in Happy Asset: CapEx & Renos, such as its key details, an Asset Manager, a default project assignee and a Chart of Accounts.
Use them to automate certain actions at that property, such as assigning every new project to one user.
 In this article
Opening property settings
 Open Property Settings
Select a property, then select Property Settings at the bottom of the left-side menu.
| Group | Fields |
|---|---|
| General | Name, Legal Name, Primary Type (for example, conventional), Property Class (for example, A), Year Built, Year Remodeled |
| Unit Information | Number of Residential Units, Number of Commercial Units, Leasing Status (for example, stabilized) |
| Ownership & Management | Ownership Group, Management Company |
| Investment Information | Investment Strategy (for example, value add), Target Disposition Date, Disposition Date |
Property Defaults: what you can set
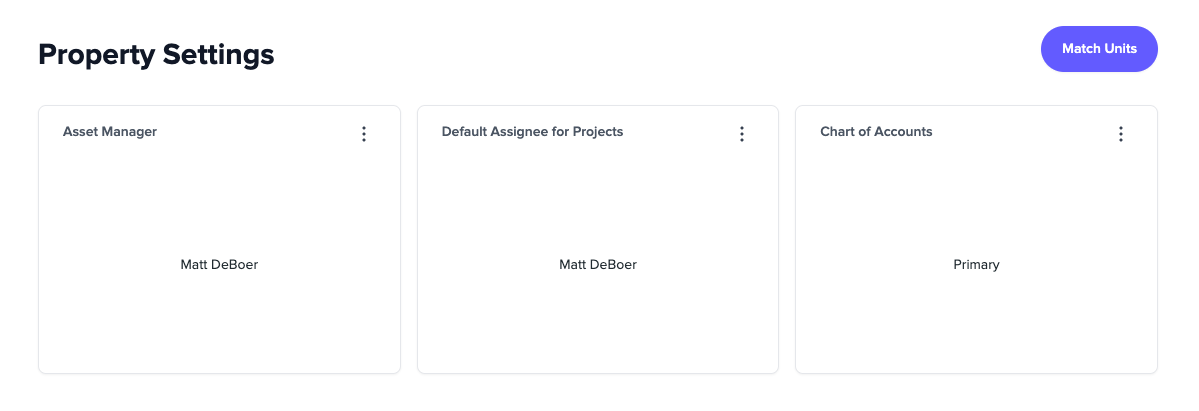
The Property Defaults section lets you:
- Assign an Asset Manager for the property
- Set a Default Assignee for projects at the property
- Set a Chart of Accounts for the property
Assigning an Asset Manager to a property
Open the Assign Role window
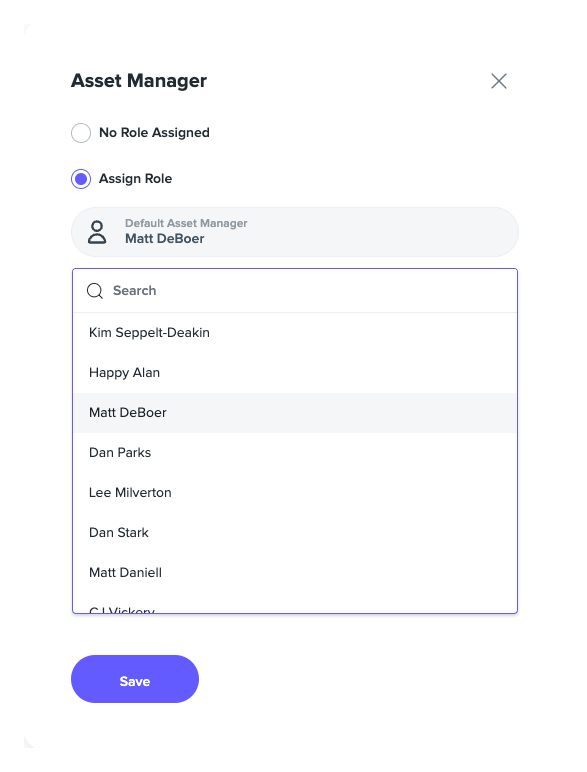
On the property settings page, select Assign Role. A side window opens.
 Choose the user
Select Assign Role and choose a user from the drop-down.
 Save the assignment
Select Save at the bottom of the window.
Setting a Default Assignee for new projects
Open the Default Assignee window
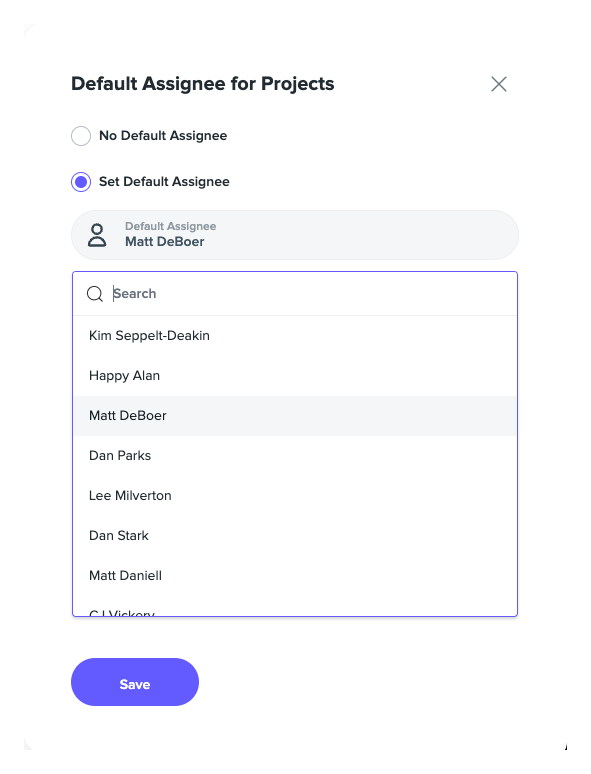
On the property settings page, select Assign Default Assignee. A side window opens.
Choose the user
Select Assign Role and choose a user from the drop-down.
Save the assignment
Select Save at the bottom of the window.
 Tip
Every new project created for the property is automatically assigned to this user.
 Before you link a Chart of Accounts
You must have created a Chart of Accounts for your business before it can be linked to a property.
Linking a Chart of Accounts to a property
Open the Chart of Accounts menu
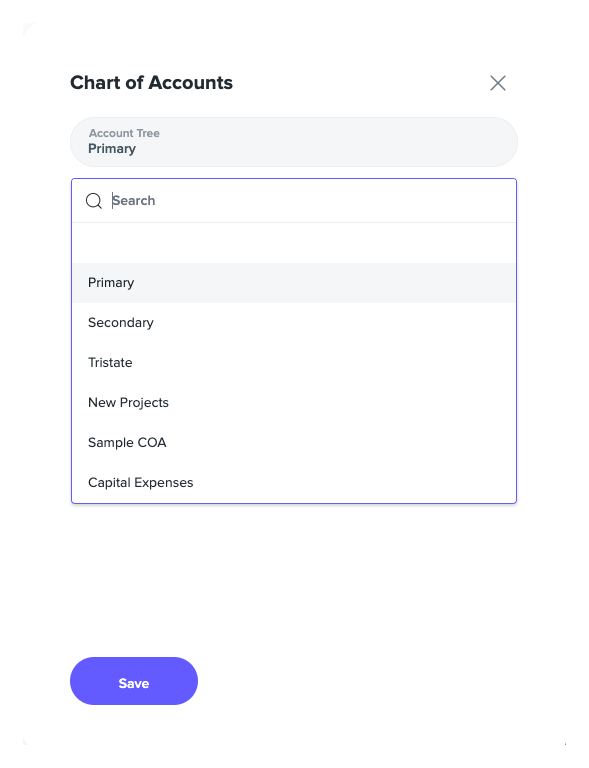
On the property settings page, select the vertical three-dot icon.
Choose the Chart of Accounts
Select a Chart of Accounts from the drop-down.
Save the link
Select Save to link the Chart of Accounts to the property.
Tip
When a capital project or unit renovation is created, the assignable GL codes come from this Chart of Accounts. GL Accounts can also be assigned to fixed assets.