Cost Capture lets inspectors record damage costs during an inspection, mark them as resident charges (chargebacks), and review them before they are saved, approved or sent to your PMS. It is most often used at resident move-out to charge back damages, but you can use it on any inspection type.
 In this article
Related links
 Cost Capture is in General Access
The Cost Capture workflow is live for all customers. It does not change your previous or current inspection workflow. To turn it on, follow the setup sections below, starting with the inspection template.
Who uses Cost Capture
Cost Capture covers the whole workflow, from admin setup to the inspector in the field. It is delivered in three phases, and you can adopt it at any phase.
- Admins: manage default costs with cost sheets, assign several properties to one cost sheet, see unassigned (orphaned) properties in a warning banner, and get an email when new items need review.
- Operations, Property and Maintenance Managers: review and approve resident charges before they are sent to Accounting.
- Technicians and Inspectors: capture charges, choose resident charges and submit them for approval inside the inspection.
- Residents: get an inspection report with charges and photos summarized at the top, with charges sent to the PMS for Accounting to process.
- Accountants: receive resident charges in the PMS automatically, with resident name, damage descriptions, charge amounts and a link to the inspection report with photos.
| Phase | Status |
|---|---|
| 1. Cost Sheets and Cost Capture | General Access |
| 2. Approval Workflow | General Access |
| 3. Integrated Resident Charges: Yardi | Early Access (contact your CSM/CX representative to enable) |
| 3. Integrated Resident Charges: Entrata | Early Access (contact your CSM/CX representative to enable) |
| 3. Integrated Resident Charges: RealPage | Early Access (contact your CSM/CX representative to enable) |
| 3. Integrated Resident Charges: ResMan | Not planned |
| 3. Integrated Resident Charges: AppFolio | Not planned |
| 3. Integrated Resident Charges: MRI | Not planned |
Before you start
- Cost Capture turned on for each inspection template you want to use
- At least one cost sheet created and its line items reviewed
- Properties assigned to a cost sheet
- Optional: at least one user with the Approve Resident Charges permission, for approvals
Who can approve resident charges
Approving resident charges needs the Approve Resident Charges permission, whatever the person's job title. Give it to at least one user before you rely on the approval workflow.
The Approval Workflow is in General Access. Sending approved charges to your PMS is a separate phase: Yardi, Entrata and RealPage are in Early Access (contact your CSM/CX representative to enable), and ResMan, AppFolio and MRI are not planned.
Turn on Cost Capture for an inspection template
 Open Templates
Select the gear icon in Happy Property Maintenance, then select Templates.
 Open the template
Search for and select the template you want to capture costs with.
 Turn on Cost Capture Workflow Enabled
Switch on the Cost Capture Workflow Enabled toggle.
 Tip
Repeat for each template you want to capture charges with.
 Check the ratings
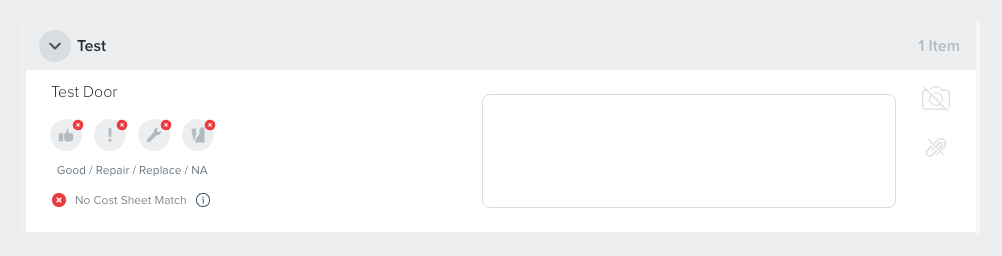
A red X now shows above each rating for each inspection item.
Tip
This is intentional. The red X's turn into green checkmarks once the items are added to your cost sheets.
Create a cost sheet in Admin Center
Open Cost Sheets
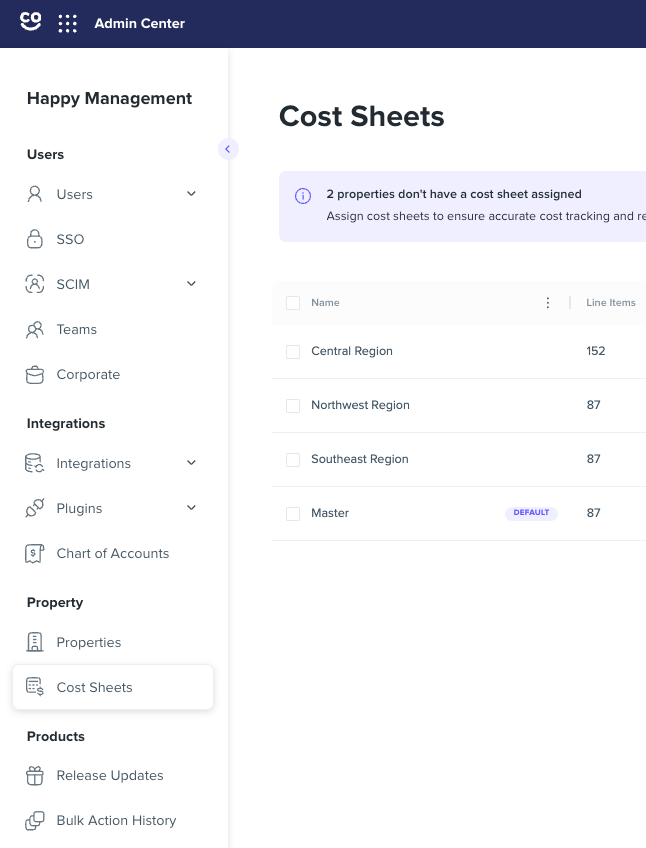
Open Admin Center and select Cost Sheets in the navigation.
Tip
No cost sheets exist by default.
Start a new cost sheet
Select New Cost Sheet in the top right corner, then download the .xlsx template.
Fill in the Cost and Allow Custom Cost columns
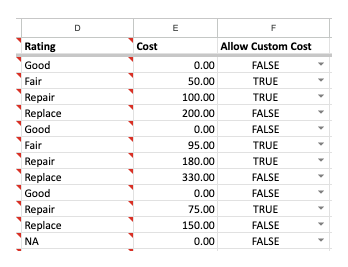
Open the spreadsheet in any editor and enter values in the Cost and Allow Custom Cost columns only.
Tip
The first four columns are locked on purpose. Leave the cost at 0.00 for any item where a default cost doesn't apply.
Upload the file
Save the spreadsheet and upload it back into the Cost Sheet workflow.
 Name the cost sheet
Enter a name for the cost sheet. Optionally mark it as the default.
 Check the Cost Sheets list
The new cost sheet appears on the Cost Sheets landing page.
What Allow Custom Cost does
Set Allow Custom Cost to true to let the inspector override the default cost. Set it to false and the default cost cannot be overridden.
Repair vs. Replace
Consider allowing a custom cost for items marked Repair, since repair damage can vary a lot. You may not want custom costs for items marked Replace, where the cost is set by the lease agreement or you know the true cost to replace.
Cost sheets by region, class or property
Many customers create cost sheets by region or class, since parts and replacement pricing varies by region and quality. You can also create a cost sheet for one property: for instance, a property in a very expensive area such as Orange County, CA.
Edit line items on a cost sheet
Open Edit Line Items
On the Cost Sheets landing page, select a cost sheet to open its menu, then select Edit Line Items.
Edit the cost
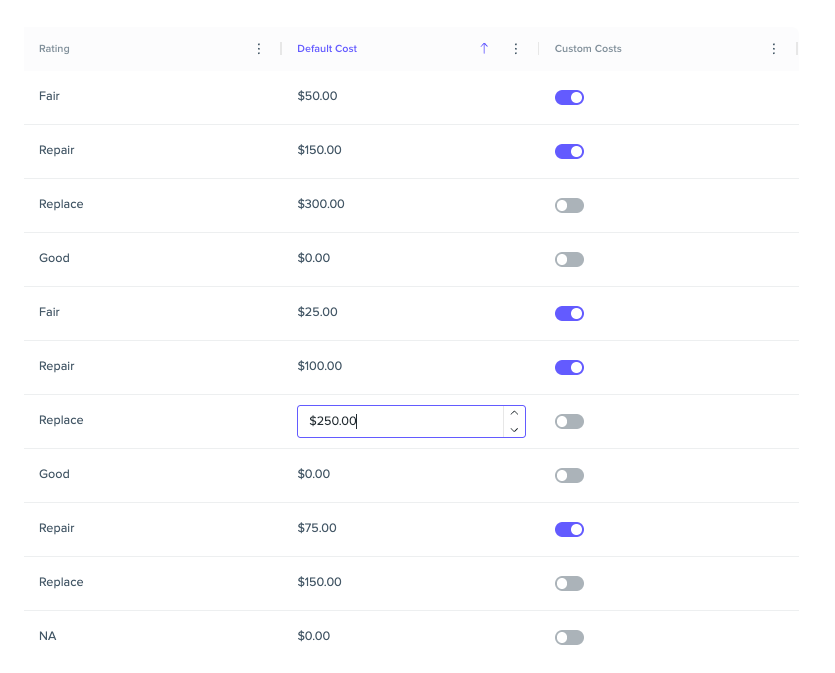
Select the Default Cost field to edit it in line, or switch the Custom Cost toggle.