Inspection templates
Steps
- Navigate to Inspection Templates
From the menu, go to Maintenance → Inspection Templates. - Start Your Template
Click the Add Template button. The new template will open. - Enter Template Details
Add a name and description for your template. - Select a Template Type
From the Template Type section, select one of the following types:
- Properties: Inspections for common areas or assets. Examples include lobbies, hallways, or elevators.
- Units: Inspections of units that don't require tenant signatures. These can be used for regularly performed inspections or pre-move-out inspections.
- Turnover: Pre-move-in inspections that require resident signatures. These inspections verify that residents accept the current state of the unit and that items requiring attention have been addressed.
- Add Rooms
Rooms are areas to be inspected and will have other inspection items assigned to them. Click on the Rooms tab in the header. One room is created by default when you start a template.
To add another room, click the Add Additional Area button.
To delete a room, click the Trash button.
To edit a room's name, type the name into the Inspection Area input. - Add Items
Items are assigned to rooms and appear in inspection forms for agents to complete. Name the inspection item according to the items that need to be inspected within that room. Click on the Items tab in the header. - Set a Field Type
Each item has a corresponding field type. Select one of the following options from the Field Type input:
- Condition: Provides the inspecting agent with an input containing the possible conditions of an inspection item. Options are Good, Repair, Replace, Damaged, and Wear and Tear.
- Yes/No: Provides the inspecting agent with a Yes/No choice. This can be used for questions such as "Clean Windows?"
- Free Form: Creates a text input where the inspection agent can enter a description of an item.
- Custom: Custom will allow you to select specific conditions to add to a Condition type input. For example, you can only select Good and Repair.
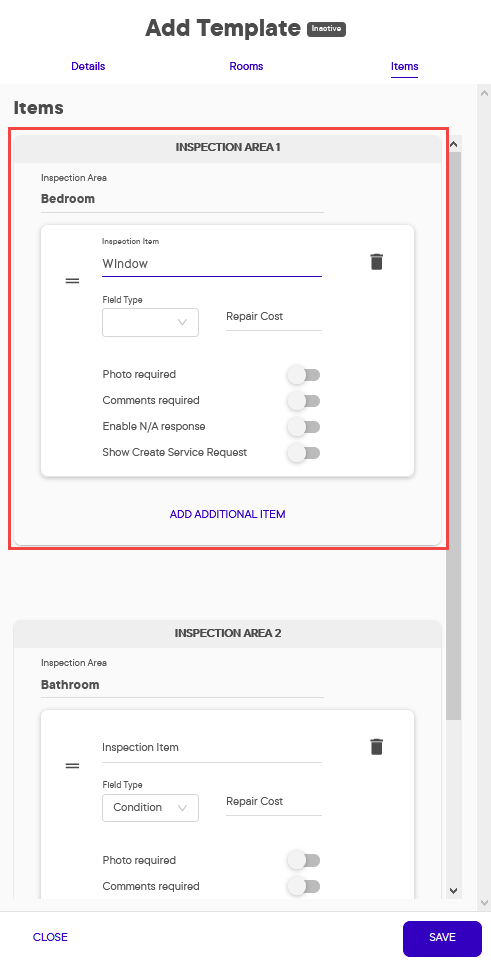
- Add a Repair Cost
Each inspection item will also have a repair cost. This is automatically applied when the inspection agent selects a relevant condition, such as Repair. - Toggle Additional Behaviors and Requirements
A series of toggles allow you to set additional behaviours for an inspection:
- Photo Required: Requires a photo of an item before an inspection is submitted.
- Comments Required: The inspecting agent must comment before submitting an inspection.
- Enable N/A Response: Allows an inspecting agent to select N/A (Not Applicable) when reviewing an inspection item.
- Show Create Service Request: Displays a Create Service Request option for an inspection item. When an inspecting agent selects this option, a service request will be automatically created for this item.
- (Optional) Add Additional Item
To add another item, click the Add Additional Item button. - Save Your Progress
When all rooms and items have been completed, click the Save button on the bottom right to create the template.